May 14, 2010

Now Kay Framework has GAETestBase bundled!

What I've been working on recently is to incorporate GAETestBase to Kay Framework.

I've just finished the adapting work and bundled GAETestBase works very nicely with kay framework. You just need to change the base class of your testcase to "kay.ext.testutils.gae_test_base.GAETestBase" like:

from kay.ext.testutils.gae_test_base import GAETestBase
class DummyTest1(GAETestBase):
  #...
  def test_foo(self):
    # ...
    # ...

By default, when you run your tests via gaeunit, the web testrunner will collect testcases from all of your applications defined in settings.INSTALLED_APPS variable. For now, you cannot change this behavior, but in the near future, I'll add a feature for configuring which test to run via the gaeunit web testrunner.

The recent version of Kay has a url mapping for web testrunner, but your app.yaml may lack of it. In such a case, please add following entry to your app.yaml:

- url: /_ah/test.*
  script: kay/ext/testutils/gaeunit.py
  login: admin

As you can see, you can run your test by visiting a URL like "/_ah/test".

As a note, all of your tests will be called in parallel, so it might leads to unexpected test failures. So you need to write your test functions independent from other tests.

Please see my previous post for details about how to configure GAETestBase.

Happy testing!

How to download souce code of your application written with kay

Let me introduce a small trivia to you. What if your harddisk crashes and you lost your source code, hopefully, you might use some source code management system such as cvs, subversion, mercurial or git, in such a case, you can retrieve your source code back. But what if the crash occurs before your first commit, or your repository also crashes?

Don't give up!

Recent version of Kay Framework has remote_api and deferred handler by default, so there is still a chance  for retrieving it back to you.

This idea is originally come from this thread in stackoverflow.

  • First, create a brand new project with kay's manage.py script and edit your app.yaml. Just put your application-id on the top of the file.

    $ python ~/work/kay/manage.py startproject downloadcode
    Running on Kay-0.10.0
    Finished creating new project: downloadcode.
    $ cd downloadcode
    $ vi settings.py
    
  • Second, create a file named "restore_code.py" as follows:

    import os
    from google.appengine.ext import db
    
    expr = """
    [type(
        'CodeFile',
        (__import__('google.appengine.ext.db').appengine.ext.db.Expando,),
        {})(
            name=dp+'/'+fn,
            data=__import__('google.appengine.ext.db').appengine.ext.db.Text(
                open(dp + '/' + fn).read()
            )
        ).put() if not dp.startswith('../kay') else None
     for dp, dns, fns in __import__('os').walk('..')
     for fn in fns]
    """
    
    
    class CodeFile(db.Model):
      name = db.StringProperty(required=True)
      data = db.TextProperty(required=True)
    
      @classmethod
      def kind(cls):
        return cls.__name__
    
    def restore():
      for cf in CodeFile.all():
        fpath = cf.name.replace("../", "./_restored_files/")
        dirname = os.path.dirname(fpath)
        if not os.path.exists(dirname):
          os.makedirs(dirname)
        fh = open(fpath, "w")
        fh.write(cf.data)
        fh.close()
    
    def scan():
      from google.appengine.ext.deferred import defer
      defer(eval, expr)
    
  • Next, connect production server with "python manage.py rshell command."
    $ python manage.py rshell
    Running on Kay-0.10.0
    Username:matsuo.takashi
    Password:
    Interactive Kay Shell with RemoteDatastore. 
    -----------------WARNING--------------------
    
    Please be careful in this console session.
    
    -----------------WARNING--------------------
    
    
    In [1]: import restore_code
    In [2]: restore_code.scan()
    restore_code.scan() will scan filesystems on the production and create CodeFile entities in the datastore. This work will be done by deferred handler, so you may need to wait a bit, but the completion of this process won't be notified. So why don't you take a break here and have a cup of coffee.
  • Lastly, call "restore_code.restore()" function.
    In [3]: restore_code.restore()
    In [4]:

Then, you can have your entire source code except for static files and configuration files(such as app.yaml, index.yaml, etc..) in a directory named "_restored_files".

Yey, now you've got your code back!

May 13, 2010

Introducing GAETestBase

A Japanese highly skilled engineer tago-san wrote an excellent module named GAETestBase. I'd like to introduce GAETestBase to you all. This entry is basically an English translation of this article of his.

GAETestBase is a useful subclass of the standard unittest.TestCase. You can just write your test classes as usual by just extending GAETestBase class for utilizing this modules functionality.

GAETestBase can be downloaded at Google Code Repository.

What can I do with this module?

  • Run your tests via CLI
    • You can run your tests without setting up necessary environments (e.g. stubs,  env, etc..)
    • Tests will be use remote_api connection for accessing production datastore if you configure to do so in your TestCase.
  • Run your tests via GAEUnit
    • GAEUnit is a web-based test runner hosted at: GAEUnit Google Code
    • You can run your test with web-browser in your development environment.
    • You can also run your tests with web-browser in your production environment. The test will be invoked under real production services(not memory based DatastoreFileStub) if you configure to do so.
  • Run your tests with special overridden kind() method.
    • You can use this overridden kind method just in your tests without any changes in your code.
      • For example, entities of  a model class "MyModel" will be stored as kind "t_MyModel".
      • Be careful with this special kind method in your TestCase. Please see an example bellow.

        Key.from_path('MyModel', id)       # NG!
        Key.from_path(MyModel.kind(), id)  # OK!
    • Especially useful with tests via remote_api and tests on production(GAEUnit) because you can run your tests without any data pollution.
    • Of course, you can suppress this behavior by configuration
  • Clean up all the kinds that are used in your tests.
    • You can delete all the kinds used in your test after running your test.
      • Only the kinds which is accessed in a particular TestCase, will be deleted.
      • *accessed* here includes just reading. So if you read a existing kind, the kind will become a target of deletion.
    • CAUTION: This feature could be very dangerous if you disable overridden kind method.

    Let's do it

    Download necessary files and deployment

    You need to do following three things before start writing your tests.
    1. Deploy gaeunit.py
      • Download the file and put it into your project directory.
      • You need to re-write this file for changing _LOCAL_TEST_DIR if your tests are not placed in test/*.py.
    2. Add two entries to your app.yaml
      • Configure a gaeunit handler and remote_api handler as follows:


        - url: /remote_api
          script: $PYTHON_LIB/google/appengine/ext/remote_api/handler.py
          login: admin
        - url: /test.*
          login: admin  # This is important if you deploy the test directory in production!
          script: gaeunit.py

    3. Create "test" directory and put gae_test_base.py into it, and edit constant variables in the file.
      • You need to configure following variables:
        • GAE_HOME: a path for google appengine SDK
        • PROJECT_HOME: a path for your target project
        • APP_ID: your application id
        • REMOTE_API_ENTRY_POINT: a path section of the URI of remote_api (e.g. "/remote_api" for above example).

    Run your test in local env.

    Firstly, let's try running your test for local environment. This is a pretty ordinary test. "test_defs" here is just for model definition, so replace it with actual module with yours.

    from gae_test_base import *
    
    from test_defs import *
    from google.appengine.ext import db
    
    class DummyTest1(GAETestBase):
    
        def test_put(self):
            x1 = XEntity(x="x1")
            k1 = x1.put()
            self.assertEqual(db.get(k1).x, "x1")
    
        def test_tx(self):
            def tx1(x2key, x2, x3):
                x2 = XEntity(key=x2key, x=x2)
                x3 = XEntity(x=x3, parent=x2)
                x2.put()
                x3.put()
                return (x2.key(), x3.key())
            x2k = db.allocate_ids(db.Key.from_path(XEntity.kind(), -1), 1)[0]
            k2, k3 = db.run_in_transaction(tx1, db.Key.from_path(XEntity.kind(), int(x2k)), "x2", "x3")
            self.assertEqual(db.get(k2).x, "x2")
            self.assertEqual(db.get(k3).x, "x3")

    Actual tests are very simple as follows:
    1. test_put
      • Create a new entity and put() it.
      • Getting an entity with returned key again, and compare values of two entities.
    2. test_tx
      • Define a following function "tx1" for transaction
        • receives a key for a root entity, a value for a property of the root entity, and a value for a property of the child entity as its arguments.
        • creates a new root entity and a child entity.
        • puts'em together
        • returns those two keys
      • Get an id for a new root entity by invoking allocate_ids
      • Run tx1 under a transaction
      • Get two entities with the key returned from transaction call, and compare property values with expected one.
    Here is an example output when running this testcase:

    $ python2.5 dummy_test.py 
    ..
    ----------------------------------------------------------------------
    Ran 2 tests in 0.020s
    
    OK
    $

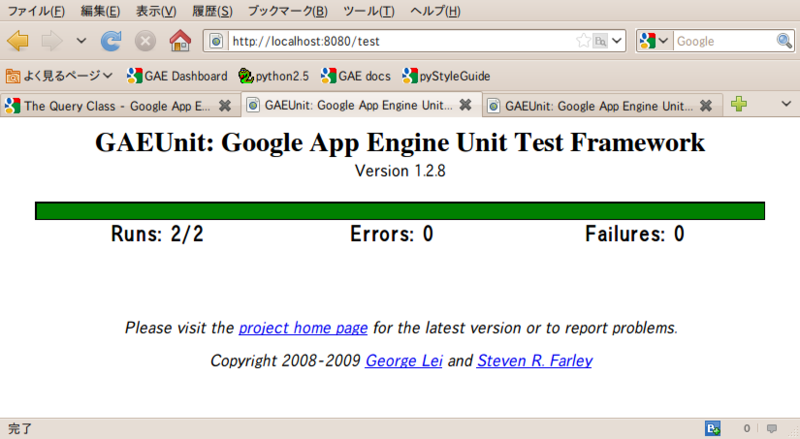
    Here is an example screenshot when running this testcase via GAEUnit:


    Run your test via remote_api or on production

    Next, let's add a new testcase that uses the production datastore as its backend. Here is an example configuration for using remote_api via CLI, and using production datastore when deployed on appspot.

    class DummyTest2(GAETestBase):
        USE_PRODUCTION_STUBS = True
        USE_REMOTE_STUBS = True
    
        def test_put(self):
            y1 = YEntity(y="y1")
            k1 = y1.put()
            self.assertEqual(db.get(k1).y, "y1")
    
        def test_tx(self):
            def tx1(y2key, y2, y3):
                y2 = YEntity(key=y2key, y=y2)
                y3 = YEntity(y=y3, parent=y2)
                y2.put()
                y3.put()
                return (y2.key(), y3.key())
            y2k = db.allocate_ids(db.Key.from_path(YEntity.kind(), -1), 1)[0]
            k2, k3 = db.run_in_transaction(tx1, db.Key.from_path(YEntity.kind(), int(y2k)), "y2", "y3")
            self.assertEqual(db.get(k2).y, "y2")
            self.assertEqual(db.get(k3).y, "y3")

    You can configure all the behavior by defining class attributes on your extended TestCase classes. The default value of all the configurable attributes is False when omitted. This new testcase is almost the same as the previous testcase except for a target model class.

    Here is an example output via CLI:

    $ python2.5 dummy_test.py 
    ....
    ----------------------------------------------------------------------
    Ran 4 tests in 6.578s
    
    OK
    $

    Now you can recognize that, this time, two testcases are called. You may asked your username and password on test that uses remote_api, though its omitted because there is a valid appcfg_cookies.

    Here is an output via GAEUnit:


    You can also run these tests on appspot by just visiting http://app-id.appspot.com/test. After running these tests on appspot, you can see that entities which are used in your test are stored in the production datastore. A kind of these entities is "t_YEntity" (specially prefixed for test) like below:


    Cleaning up entities in your tests

    If you don't like entities created in your tests remains, you can write a testcase which deletes entities which are accessed in your tests like:

    class DummyTest3(GAETestBase):
        USE_PRODUCTION_STUBS = True
        USE_REMOTE_STUBS = True
        CLEANUP_USED_KIND = True
    
        def test_put(self):
            z1 = ZEntity(z="z1")
            k1 = z1.put()
            self.assertEqual(db.get(k1).z, "z1")
    
        def test_tx(self):
            def tx1(z2key, z2, z3):
                z2 = ZEntity(key=z2key, z=z2)
                z3 = ZEntity(z=z3, parent=z2)
                z2.put()
                z3.put()
                return (z2.key(), z3.key())
            z2k = db.allocate_ids(db.Key.from_path(ZEntity.kind(), -1), 1)[0]
            k2, k3 = db.run_in_transaction(tx1, db.Key.from_path(ZEntity.kind(), int(z2k)), "z2", "z3")
            self.assertEqual(db.get(k2).z, "z2")
            self.assertEqual(db.get(k3).z, "z3")

    You can run these test via CLI, via GAEUnit(dev), and via GAEUnit(prod).

    After running your tests, you can see there is no "t_ZEntity" on the datastore at all:


    Per testcase cutomizing

    Here is an example for customizing kind prefix and clean up behavior.


    class DummyTest4(GAETestBase):
        USE_PRODUCTION_STUBS = True
        USE_REMOTE_STUBS = True
        CLEANUP_USED_KIND = False
        KIND_PREFIX_IN_TEST = 'test'
    
        def test_put(self):
            z1 = ZEntity(z="z1")
            k1 = z1.put()
            self.assertEqual(db.get(k1).z, "z1")
    
        def test_tx(self):
            def tx1(z2key, z2, z3):
                z2 = ZEntity(key=z2key, z=z2)
                z3 = ZEntity(z=z3, parent=z2)
                z2.put()
                z3.put()
                return (z2.key(), z3.key())
            z2k = db.allocate_ids(db.Key.from_path(ZEntity.kind(), -1), 1)[0]
            k2, k3 = db.run_in_transaction(tx1, db.Key.from_path(ZEntity.kind(), int(z2k)), "z2", "z3")
            self.assertEqual(db.get(k2).z, "z2")
            self.assertEqual(db.get(k3).z, "z3")

    After running this test, you can see "test_ZEntity" is stored in the datastore(ruled out from deletion).


    Accessing the real data on production


    Here is an example testcase for accessing the real data on prod.


    class DummyTest5(GAETestBase):
        USE_PRODUCTION_STUBS = True
        USE_REMOTE_STUBS = True
        CLEANUP_USED_KIND = False
        KIND_NAME_UNSWAPPED = True
    
        def test_put(self):
            count = PEntity.all().count()
            p1 = PEntity(i=count)
            k1 = p1.put()
            px = db.get(k1)
            self.assertEqual(px.i, count)

    If KIND_NAME_UNSWAPPED is set to True, you can suppress overriding kind method on db.Model. So, if you turn on USE_REMOTE_STUBS or USE_PRODUCTION_STUBS, your tests can access the real data on the production datastore.

    How to use this module with Kay Framework?

    Now Kay has GAETestBase bundled, so you can use it out of the box!
    For more details, please see this article as well.

    Caution

    TODO: translate


    Far beyond

    TODO: translate

    May 8, 2010

    Creating an app for Google Apps Marketplace with Kay - part 1 (revised)

    This entiry is obsoleted because Appengine SDK-1.3.4 was released, and it has a capability for OpenID authentication. I'll definitely start figuring an easy way for writing Google App Engine application for Google Apps Marketplace soon, so please wait a bit.

    I've just implemented an authentication mechanism in Kay framework for Google Apps MarketPlace. So let me introduce how to deploy a marketplace application with Kay(repository version).

    I have made a few more improvements in authentication system of Kay Framework, so I slightly change this article at 4:20PM on May 13th 2010JST.

    1. Create an app-id

    In this example, I've created a brand new application slot called 'marketplace-app'.

    2. Register a listing on the MarketPlace

    Firstly, you need to register yourself as a MarketPlace Vendor.
    http://www.google.com/enterprise/marketplace/

    Click a link 'Become a vendor' in the bottom of the page above and you'll get an instruction.

    Actually you need to click a link 'Sign in' at top-right corner of the page above, and fill the form.

    Then, you can create your listing. Click a button 'Create a new listing' in your Vendor Profile page.

    In this example, lets create an installable app, so check the first checkbox 'My product may be directly installed into Google Apps domains'.

    You can fill other fields arbitrarily except for the field 'Manifest'.

    Manifest xml here:

    <?xml version="1.0" encoding="UTF-8" ?>
    <ApplicationManifest xmlns="http://schemas.google.com/ApplicationManifest/2009">
        
      <!-- Support info to show in the marketplace & control panel -->
      <Support>
        <!-- URL for application setup as an optional redirect during the install -->
        <Link rel="setup" href="https://marketplace-app.appspot.com/a/${DOMAIN_NAME}/setup" />
        
        <!-- URL for application configuration, accessed from the app settings page in the control panel -->
        <Link rel="manage" href="https://marketplace-app.appspot.com/a/${DOMAIN_NAME}/admin" />
    
        <!-- URL explaining how customers get support. -->
        <Link rel="support" href="https://marketplace-app.appspot.com/a/${DOMAIN_NAME}/support" />
      
        <!-- URL that is displayed to admins during the deletion process, to specify policies such as data retention, how to claim accounts, etc. -->
        <Link rel="deletion-policy" href="https://marketplace-app.appspot.com/deletion-policy" />
      </Support>
        
      <!-- Name and description pulled from message bundles -->
      <Name>Marketplace sample application</Name>
      <Description>A simple application for the marketplace</Description>
      
      <!-- Show this link in Google's universal navigation for all users -->
      <Extension id="navLink" type="link">
        <Name>Sample</Name>
        <Url>https://marketplace-app.appspot.com/a/${DOMAIN_NAME}/start</Url>
        <!-- This app also uses the Calendar API -->
        <Scope ref="calendarFeed"/>
      </Extension>
      
      <!-- Declare our OpenID realm so our app is white listed -->
      <Extension id="realm" type="openIdRealm">
        <Url>https://marketplace-app.appspot.com/</Url>
      </Extension>
    
      <!-- Need access to the Calendar feed -->
      <Scope id="calendarFeed">
        <Url>https://www.google.com/calendar/feeds/</Url>
        <Reason>This application shows the next Calendar event.</Reason>
      </Scope>
    
    </ApplicationManifest>

    In this example, there is a calendar feed setting for 2 legged OAuth access scope. For more details with a Manifest file format, please see:
    http://code.google.com/googleapps/marketplace/manifest.html

    After adding your listings, you will see a preview page for your app. There is an attractive 'Add it now' button on the right, but of course, you need to implement your application before adding this app.

    Instead, click a link 'My Vendor Profile' on the top-right corner and you can see your listings with a link 'View OAuth Consumer Key'.

    3. Implementation

    Let's create a new project with Kay management script:

    $ python /some/where/kay/manage.py startproject marketplace-app
    Running on Kay-0.10.0
    Finished creating new project: marketplace-app.
    $ cd marketplace-app
    $ python manage.py startapp core

    settings.py:

    INSTALLED_APPS = (
      'core',
      'kay.ext.gaema',
    )
    
    APP_MOUNT_POINTS = {
      'core': '/',
    }
    
    MIDDLEWARE_CLASSES = (
      'kay.sessions.middleware.SessionMiddleware',
      'kay.auth.middleware.AuthenticationMiddleware',
    )
    AUTH_USER_BACKEND = "kay.auth.backends.gaema.GAEMABackend"
    GAEMA_USER_MODEL = "core.models.User"
    
    GAEMA_SECRETS = {
      'google_consumer_key': 'your consumer key here',
      'google_consumer_secret': 'your consumer key secret here',
    }
    IS_MARKETPLACE_APP = True
    

    Replace GAEMA_SECRETS with actual values. You can see consumer key and consumer key secret with clicking the link 'View OAuth Consumer Key' mentioned above. The last attribute 'IS_MARKETPLACE_APP' is important for this authentication system work normaly.

    core/models.py:

    # -*- coding: utf-8 -*-                                                                                                                                          
    # core.models                                                                                                                                                    
    
    from google.appengine.ext import db
    from kay.ext.gaema.models import GAEMAUser
    
    # Create your models here.                                                                                                                                       
    
    class User(GAEMAUser):
      pass
    

    Information of users will be stored into this model.

    core/urls.py:

    # -*- coding: utf-8 -*-
    # core.urls
    #
    
    from kay.routing import (
      ViewGroup, Rule
    )
    
    view_groups = [
      ViewGroup(
        Rule('/a/<domain_name>/setup', endpoint='domain_setup',
             view='core.views.domain_setup'),
    
        Rule('/a/<domain_name>/admin', endpoint='domain_admin',
             view='core.views.domain_admin'),
    
        Rule('/a/<domain_name>/support', endpoint='domain_support',
             view='core.views.domain_support'),
    
        Rule('/a/<domain_name>/start', endpoint='domain_start',
             view='core.views.domain_start'),
    
        Rule('/deletion_policy', endpoint='deletion_policy',
             view='core.views.deletion_policy'),
      )
    ]
    

    core/views.py:

    # -*- coding: utf-8 -*-                                                                                                                                          
    """                                                                                                                                                              
    core.views                                                                                                                                                       
    """
    from werkzeug import (
      unescape, redirect, Response,
    )
    
    from kay.utils import render_to_response
    from kay.ext.gaema.utils import get_gaema_user
    from kay.auth.decorators import login_required
    
    def index(request):
      return render_to_response('core/index.html', {'message': 'Hello'})
    
    def domain_setup(request, domain_name):
      callback = request.args.get('callback')
      if callback is None:
        return Response("No callback supplied.")
      return redirect(callback)
    
    def domain_admin(request, domain_name):
      return Response("%s administration." % domain_name)
    
    def domain_support(request, domain_name):
      return Response("%s support." % domain_name)
    
    def deletion_policy(request):
      return Response("Deletion policy.")
    
    @login_required
    def domain_start(request, domain_name):
      return Response("%s start.\n%s" % (domain_name, request.user.raw_user_data))
    

    A decorator 'login_required' takes care of OpenID/OAuth stuff, so you don't need to do anything at all. The user information is in request.user.raw_user_data.

    Let's deploy it to appspot.

    $ python manage.py appcfg update

    You can check the application with visiting https://marketplace-app.appspot.com/a/example.com/start where example.com should be replaced with your actual domain. This domain must be registered with Google Apps and make sure that "Federated Login using OpenID" is turned on.

    If the app is successfully deployed, you can see an OpenID authentication display. Let's move on.

    4. Add your app to your domain

    Go back to your Vendor Profile Page, and click your application title, then you will see the preview page of your application.

    Let's click 'Add it now' button on the right, and enter your google apps domain, and click 'Go'.
    Follow an adding application wizard like 1) Agree to terms 2) Grant data access 3) External configuration 4) Enable the app, and wait for a while, and you can see a universal navigation link 'Sample' on the top left corner of your google apps applications.

    If you click the link, you can silently signed into your application because Marketplace apps are whitelisted with a particular openid_realm.

    In part 2 of this article, I'll show you how to access user's calendar data with gdata library.

    To be continued..

    December 24, 2009

    Integrating websockets with appengine applications

    Today, I've been struggling with an experimental implementation for a pseudo server push on appengine application. So let me share it with you.

    The only problem with appengine is that we can not utilize comet like capabilities on it because of its 30 seconds request limit.

    In this article, I use external websockets server for a pseudo server push on appengine. Here is the diagram(Click for bigger image).


    Let me explain this diagram a bit.

    1. When a client request for the content, 
    2. appengine webapp will returns the newest contents with javascripts for establishing a new websockets connection to an external websockets server.
    3. The browser opens a new websockets connection to the websockets server. This connection will remain as long as possible for notifying updates of the contents.
    4. Another browser requests for updating the contents(e.g. Posting a new comment...etc...).
    5. appengine webapp will save the state in the datastore, and give the newest contents to the client, notifying about this updates to the websockets server as well, simultaneously.
    6. On the websockets server, every server process will receive the notification, and tell their clients that there is some update via the persistent websockets connection.
    7. Now, the first browser knows that there is updated contents on the server, so (in this case) it makes an ajax request to the appengine webapp, and receives the newest contents.
    I've implemented a simple chat with this architecture. Please visit and try it if you'd like. I've tested it only with Chrome 4 or higher(including chromium).

    Now, let's walk through into the code. On the appengine side, when a new comment arives, I need to notify it to the websockets server, so I use urlfetch for this. Here is the code:

    def index(request):
      form = CommentForm()
      if request.method == 'POST':
        if form.validate(request.form):
          if request.user.is_authenticated():
            form.save(owner=request.user)
          else:
            form.save()
          import time
          urlfetch.fetch('http://mars.shehas.net/update_webhook.cgi?'
                         + str(time.time()))
          return redirect(url_for('chat/index'))
      comments = Comment.all().order('-created').fetch(20)
      return render_to_response('chat/index.html',
                                {'form': form.as_widget(),
                                 'comments': comments})

    The most important thing is that after a new comment is saved, the handler makes an urlfetch call to the external websockets server for notification. It is also important to add time.time() string representation to the url because without this, appengine urlfetch server may cache the response, and this urlfetch call will be useless as a webhook.

    On the client side, we have to create a websocket connection, and set appropriate callbacks on some events of the connection. I've wrote a new class for this.

    update_check_socket.js
    function UpdateCheckSocket(host, port, resource, statusElement, callback) {
      this.host = host;
      this.port = port;
      this.resource = resource;
      this.statusElement = statusElement;
      this.callback = callback;
      this.ws = new WebSocket("ws://"+this.host+":"+this.port+this.resource);
      this.ws.onopen = function(e) {
        statusElement.innerHTML='Web sockets connected';
      };
      this.ws.onmessage = function(e) {
        var newDiv = document.createElement('div');
        newDiv.innerHTML = e.origin + decodeURIComponent(e.data);
        statusElement.insertBefore(newDiv, statusElement.firstChild);
        if (decodeURIComponent(e.data) == 'UPDATED') {
          callback();
        }
      };
      this.ws.onclose = function(e) {
        var newDiv = document.createElement('div');
        newDiv.innerHTML = 'Web sockets closed';
        statusElement.insertBefore(newDiv, statusElement.firstChild);
      };
    }
    
    function UpdateCheckSocket_send(message) {
      if(typeof(message) == 'undefined' || message =='') {
        alert('no message...');
        return;
      }
      this.ws.send(encodeURIComponent(message));
    }
    UpdateCheckSocket.prototype.send = UpdateCheckSocket_send;
    

    On the main html, there is a callback for retrieving the newest contents. In some cases, the connection will be closed unintentionally because some network routers might delete the NAT table when there has been no data  for few minutes. So there is also the code for avoiding this by sending 'NOOP' string to the server periodically.

    Here is the code for main html(as long as I'm concerned, blogger could not handle html well).

    Ok. Let's go to the websockets side. On the external websockets server, I need to 1) accept update notification from appengine webapp(webhook handler), 2) handle websockets connection and notify the update to the client.

    Here is the code for the webhook.
    update_webhook.cgi
    #!/usr/bin/python
    
    import sqlite3
    import time
    import sys
    
    conn = sqlite3.connect("/tmp/test")
    c = conn.cursor()
    try:
      c.execute('create table updated (t real)')
      c.execute('insert into updated values (?)', (time.time(),))
    except Exception, e:
      sys.stderr.write(str(e))
    c.execute('update updated set t = ?', (time.time(),))
    conn.commit()
    c.close()
    conn.close()
    
    print "Content-type: text/plain\n"
    print "OK"

    This is a very simple script. Its an experimental implementation, so currently it does't check if the request really came from a particular appengine webapp. So do not use this code as is in any production environment.

    The last piece is websocket wsh script(I used pywebsockets here).
    import sqlite3
    import time
    
    from mod_pywebsocket import msgutil
    
    CHECK_INTERVAL=1
    _UPDATE_SIGNAL='UPDATED'
    
    def web_socket_do_extra_handshake(request):
      pass  # Always accept.
    
    
    def web_socket_transfer_data(request):
      last_checked = time.time()
      conn = sqlite3.connect("/tmp/test")
      c = conn.cursor()
      while True:
        time.sleep(CHECK_INTERVAL)
        c.execute('select t from updated')
        r = c.fetchone()
        if r and r[0] > last_checked:
          last_checked = r[0]
          msgutil.send_message(request, _UPDATE_SIGNAL)

    Here, I use sqlite3 for recording the last update time. Using sqlite3 might not be appropriate for the production environment either, again, this is just an experimental implementaion :-)

    Well that's about it. Actually it works, but I don't think this is the best approach. Maybe current implementation won't scale, it might be somewhat cumbersome to setup all of these complicated stuff. I hope I can make these set of code more sophisticated and general in the future, or I hope someone can write better code/architecture for similar purpose.

    Merry X'mas and happy new year :-)

    December 12, 2009

    Using appstats with Kay

    Guido announced the preview release of appstats. This is a tool for visualizing call stats of RPC Calls on appengine that is very useful for improving application's performance.

    This tool consists of two parts; recording part and ui part. There are two ways for configuring the recording part. The first one is to use django middleware which appstats offers. Another way is to configure WSGI middleware. The former way is much easier, so I tried to utilize this django middleware with Kay.

    I have thought that I could easily utilize this middleware with small modifications because Kay has a middleware mechanism very similar to the django's one. Finally, and fortunately I can use this middleware without any modification. That's what I aimed for by implementing Kay's middleware mechanism as similarly as possible to django's one!

    MIDDLEWARE_CLASSES = (
      'appstats.recording.AppStatsDjangoMiddleware',
      'kay.auth.middleware.AuthenticationMiddleware',
    )

    Configuring the recording part is done by adding appstats.recording.AppStatsDjangoMiddleware to the MIDDLEWARE_CLASSES as above.

    Next I need to configure ui part. According to the documentation of appstats, I added an entry to my app.yaml as follows.

    - url: /stats.*
      script: appstats/ui.py
      login: admin

    This is nearly perfect, but a handlers for viewing source code didn't work correctly, so I needed to add these lines to the upper part of appstats/ui.py appengine_config.py.
    Updated, thanks Guido!

    import kay
    kay.setup_syspath()

    That's all. Now I can use appstats with Kay framework. Here are some screenshots.

    This is a dashboard.

    This is a graphical timeline.

    November 2, 2009

    pkg_resources の warning を抑制する

    sitecustomize.py を site-packages 内に下記の内容で作成する

    import warnings
    warnings.filterwarnings('ignore',
      message=r'Module .*? is being added to sys\.path', append=True)

    ここに書いてありました:
    http://lucumr.pocoo.org/2008/2/19/sick-of-pkg-resources-warnings

    October 26, 2009

    More and more lazy loading...

    I've spent a little while to make Kay load modules in more lazily manner, then I've got faster result on cold start, so I'd like to share the result with you.

    Basically, I've made this test in the same way as described this entry.

    Kay(changeset:4a854c31abbc)

    10-25 05:33PM 31.791 / 200 344ms 544cpu_ms
    10-25 05:34PM 07.998 / 200 354ms 544cpu_ms
    10-25 05:34PM 37.308 / 200 355ms 563cpu_ms
    10-25 05:35PM 00.452 / 200 336ms 525cpu_ms
    10-25 05:35PM 27.638 / 200 332ms 525cpu_ms
    10-25 05:40PM 45.837 / 200 365ms 544cpu_ms
    

    Now Kay gets significant faster result! I'm planning to release Kay-0.3.0 soon.

    October 21, 2009

    Minimum cost for warming-up various frameworks(and more)

    Overview


    There are lots of frameworks that works on appengine, so people might wonder which framework is the best one for them. So, I did a simple benchmark to see how much cpu time to warm-up various frameworks for appengine with minimized applications.

    How to test

    The rule is quite simple.
    • Use template system for rendering
    • Use very simple template
    • No middleware, context_processors
    • The view passes single string ('hello') to the template
    • No i18n (USE_I18N=False)
    Today, I tested 3 frameworks; The single series of tests was made as follows;
    1. Upload an application
    2. Access by browser once
    3. View logs on admin console and record ms and cpu_ms values
    4. Go to next framework in turn and do the same test

    Results

    And I did this series of tests five times and got following result:

    Cold Starting result

    webapp+django template

    10-20 09:29AM 32.796 / 200 332ms 369cpu_ms
    10-20 09:31AM 45.991 / 200 278ms 330cpu_ms
    10-20 09:33AM 56.086 / 200 352ms 369cpu_ms
    10-20 09:36AM 16.630 / 200 245ms 350cpu_ms
    10-20 09:39AM 13.148 / 200 266ms 350cpu_ms
    

    Kay

    10-20 09:30AM 13.555 / 200 504ms 700cpu_ms
    10-20 09:32AM 27.076 / 200 436ms 641cpu_ms
    10-20 09:34AM 37.841 / 200 417ms 621cpu_ms
    10-20 09:37AM 01.469 / 200 471ms 641cpu_ms
    10-20 09:41AM 40.874 / 200 454ms 660cpu_ms
    

    app-engine-patch

    10-20 09:31AM 00.640 / 200 663ms 1010cpu_ms
    10-20 09:33AM 12.117 / 200 594ms 991cpu_ms
    10-20 09:35AM 29.921 / 200 654ms 1030cpu_ms
    10-20 09:38AM 00.888 / 200 629ms 1030cpu_ms
    10-20 09:46AM 07.109 / 200 702ms 1108cpu_ms
    
    Additionally, I did some tests for serving by hot instances:

    Served by hot instances result

    webapp+django template

    10-20 09:39AM 23.025 / 200 6ms 3cpu_ms
    10-20 09:39AM 24.104 / 200 6ms 5cpu_ms
    10-20 09:39AM 25.212 / 200 9ms 5cpu_ms
    10-20 09:39AM 26.310 / 200 6ms 4cpu_ms
    10-20 09:39AM 27.414 / 200 7ms 4cpu_ms
    

    Kay

    10-20 09:41AM 42.991 / 200 13ms 5cpu_ms
    10-20 09:41AM 45.691 / 200 6ms 5cpu_ms
    10-20 09:41AM 46.538 / 200 7ms 5cpu_ms
    10-20 09:41AM 47.506 / 200 9ms 8cpu_ms
    10-20 09:41AM 48.536 / 200 8ms 5cpu_ms
    

    app-engine-patch

    10-20 09:46AM 09.021 / 200 10ms 10cpu_ms
    10-20 09:46AM 09.949 / 200 8ms 8cpu_ms
    10-20 09:46AM 10.869 / 200 8ms 6cpu_ms
    10-20 09:46AM 11.834 / 200 11ms 11cpu_ms
    10-20 09:46AM 12.743 / 200 9ms 10cpu_ms
    

    The application used in these tests

    The template used is common among these frameworks.

    index.html:
    <!DOCTYPE HTML PUBLIC "-//W3C//DTD HTML 4.01 Transitional//EN" "http://www.w3.org/TR/html4/loose.dtd"%gt;
    <html>
    <head>
    <meta http-equiv="Content-Type" content="text/html; charset=UTF-8">
    <title>Top Page - myapp</title>
    </head>
    <body>
    {{ message }}
    </body>
    </html>
    
    Here are the application settings for each frameworks:

    webapp+django template

    main.py:
    #!/usr/bin/env python
    #
    # Copyright 2007 Google Inc.
    #
    # Licensed under the Apache License, Version 2.0 (the "License");
    # you may not use this file except in compliance with the License.
    # You may obtain a copy of the License at
    #
    #     http://www.apache.org/licenses/LICENSE-2.0
    #
    # Unless required by applicable law or agreed to in writing, software
    # distributed under the License is distributed on an "AS IS" BASIS,
    # WITHOUT WARRANTIES OR CONDITIONS OF ANY KIND, either express or implied.
    # See the License for the specific language governing permissions and
    # limitations under the License.
    #
    
    
    import logging
    import os
    
    import wsgiref.handlers
    
    
    from google.appengine.ext import webapp
    from google.appengine.ext import db
    from google.appengine.ext.webapp import template
    
    class MainHandler(webapp.RequestHandler):
    
      def get(self):
        contents = {'message': 'hello'}
        path = os.path.join(os.path.dirname(__file__), 'index.html')
        self.response.out.write(template.render(path, contents))
    
    
    def main():
      logging.getLogger().setLevel(logging.debug)
      application = webapp.WSGIApplication([('/', MainHandler)],
                                           debug=True)
      wsgiref.handlers.CGIHandler().run(application)
    
    
    if __name__ == '__main__':
      main()
    

    Kay

    settings.py:
    # -*- coding: utf-8 -*-
    
    """
    A sample of kay settings.
    
    :Copyright: (c) 2009 Accense Technology, Inc. 
                         Takashi Matsuo ,
                         All rights reserved.
    :license: BSD, see LICENSE for more details.
    """
    
    DEFAULT_TIMEZONE = 'Asia/Tokyo'
    DEBUG = False
    SECRET_KEY = 'ReplaceItWithSecretString'
    SESSION_PREFIX = 'gaesess:'
    COOKIE_AGE = 1209600 # 2 weeks
    COOKIE_NAME = 'KAY_SESSION'
    
    ADD_APP_PREFIX_TO_KIND = True
    
    ADMINS = (
    )
    
    TEMPLATE_DIRS = (
    )
    
    USE_I18N = False
    DEFAULT_LANG = 'en'
    
    INSTALLED_APPS = (
      'myapp',
    )
    
    APP_MOUNT_POINTS = {
      'myapp': '/',
    }
    
    CONTEXT_PROCESSORS = (
    )
    
    JINJA2_FILTERS = {
    }
    
    MIDDLEWARE_CLASSES = (
    )
    AUTH_USER_BACKEND = 'kay.auth.backend.GoogleBackend'
    AUTH_USER_MODEL = 'kay.auth.models.GoogleUser'
    
    myapp/urls.py:
    # -*- coding: utf-8 -*-
    # myapp.urls
    
    
    from werkzeug.routing import (
      Map, Rule, Submount,
      EndpointPrefix, RuleTemplate,
    )
    import myapp.views
    
    def make_rules():
      return [
        EndpointPrefix('myapp/', [
          Rule('/', endpoint='index'),
        ]),
      ]
    
    all_views = {
      'myapp/index': myapp.views.index,
    }
    
    myapp/views.py:
    # -*- coding: utf-8 -*-
    # myapp.views
    
    from kay.utils import render_to_response
    
    # Create your views here.
    
    def index(request):
      return render_to_response('myapp/index.html', {'message': 'Hello'})
    

    app-engine-patch

    settings.py:
    # -*- coding: utf-8 -*-
    from ragendja.settings_pre import *
    
    # Increase this when you update your media on the production site, so users
    # don't have to refresh their cache. By setting this your MEDIA_URL
    # automatically becomes /media/MEDIA_VERSION/
    MEDIA_VERSION = 1
    
    # By hosting media on a different domain we can get a speedup (more parallel
    # browser connections).
    #if on_production_server or not have_appserver:
    #    MEDIA_URL = 'http://media.mydomain.com/media/%d/'
    
    # Add base media (jquery can be easily added via INSTALLED_APPS)
    COMBINE_MEDIA = {
        'combined-%(LANGUAGE_CODE)s.js': (
            # See documentation why site_data can be useful:
            # http://code.google.com/p/app-engine-patch/wiki/MediaGenerator
            '.site_data.js',
        ),
        'combined-%(LANGUAGE_DIR)s.css': (
            'global/look.css',
        ),
    }
    
    # Change your email settings
    if on_production_server:
        DEFAULT_FROM_EMAIL = 'bla@bla.com'
        SERVER_EMAIL = DEFAULT_FROM_EMAIL
    
    # Make this unique, and don't share it with anybody.
    SECRET_KEY = '1234567890'
    
    #ENABLE_PROFILER = True
    #ONLY_FORCED_PROFILE = True
    #PROFILE_PERCENTAGE = 25
    #SORT_PROFILE_RESULTS_BY = 'cumulative' # default is 'time'
    # Profile only datastore calls
    #PROFILE_PATTERN = 'ext.db..+\((?:get|get_by_key_name|fetch|count|put)\)'
    
    # Enable I18N and set default language to 'en'
    USE_I18N = False
    LANGUAGE_CODE = 'en'
    
    # Restrict supported languages (and JS media generation)
    LANGUAGES = (
        ('de', 'German'),
        ('en', 'English'),
    )
    
    TEMPLATE_CONTEXT_PROCESSORS = (
    )
    
    MIDDLEWARE_CLASSES = (
    )
    
    # Google authentication
    AUTH_USER_MODULE = 'ragendja.auth.google_models'
    AUTH_ADMIN_MODULE = 'ragendja.auth.google_admin'
    # Hybrid Django/Google authentication
    #AUTH_USER_MODULE = 'ragendja.auth.hybrid_models'
    
    LOGIN_URL = '/account/login/'
    LOGOUT_URL = '/account/logout/'
    LOGIN_REDIRECT_URL = '/'
    
    INSTALLED_APPS = (
        # Add jquery support (app is in "common" folder). This automatically
        # adds jquery to your COMBINE_MEDIA['combined-%(LANGUAGE_CODE)s.js']
        # Note: the order of your INSTALLED_APPS specifies the order in which
        # your app-specific media files get combined, so jquery should normally
        # come first.
        'appenginepatcher',
        'ragendja',
        'myapp',
    )
    
    # List apps which should be left out from app settings and urlsauto loading
    IGNORE_APP_SETTINGS = IGNORE_APP_URLSAUTO = (
        # Example:
        # 'django.contrib.admin',
        # 'django.contrib.auth',
        # 'yetanotherapp',
    )
    
    # Remote access to production server (e.g., via manage.py shell --remote)
    DATABASE_OPTIONS = {
        # Override remoteapi handler's path (default: '/remote_api').
        # This is a good idea, so you make it not too easy for hackers. ;)
        # Don't forget to also update your app.yaml!
        #'remote_url': '/remote-secret-url',
    
        # !!!Normally, the following settings should not be used!!!
    
        # Always use remoteapi (no need to add manage.py --remote option)
        #'use_remote': True,
    
        # Change appid for remote connection (by default it's the same as in
        # your app.yaml)
        #'remote_id': 'otherappid',
    
        # Change domain (default: .appspot.com)
        #'remote_host': 'bla.com',
    }
    
    from ragendja.settings_post import *
    
    urls.py(minimized):
    # -*- coding: utf-8 -*-
    from django.conf.urls.defaults import *
    from ragendja.urlsauto import urlpatterns
    from ragendja.auth.urls import urlpatterns as auth_patterns
    
    urlpatterns = auth_patterns + patterns('',
        (r'', include('myapp.urls')),
    ) + urlpatterns
    
    
    myapp/urls.py:
    # -*- coding: utf-8 -*-
    from django.conf.urls.defaults import *
    
    urlpatterns = patterns(
      'myapp.views',
      url(r'^$', 'index', name='myapp_index'),
    )
    
    myapp/views.py:
    # -*- coding: utf-8 -*-
    from ragendja.template import render_to_response
    
    def index(request):
      return render_to_response(request, 'myapp/index.html',
                                {'message': 'Hello'})
    

    Conclusion

    There are significant defferences among warm-up costs of these three frameworks. But when it comes to serving by warm instances, the defferences are rather small.

    Actually you can choose whatever you want, but what if you must to choose one framework among these three options?

    webapp+django template is really fast(actually without django template, webapp is much faster than this, but I think its unfair ;-P), so If you really need speed, webapp might be the best option.

    Having said that, sometimes we need a fancy way for constructing rather complex applications. Perhaps you can choose Kay/app-engine-patch if you can accept 2 or 3 times(obviously compared with webapp) costs on cold-startup.

    If you love Django admin capability and hardly throw it away, only app-engine-patch could be your option.

    Actually I don't know much about app-engine-patch, so these settings is not enough. Please let me know if that's the case. If you make some tests similar to these tests, I'd be glad to know the result.

    The result with tipfy is added.
    tipfy is one of the fastest and lightest frameworks. You can use a very nice debugger(werkzeug's) in dev environment(This debugger is also available with Kay).

    Cold Starting result

    tipfy

    10-20 03:43PM 28.814 / 200 411ms 602cpu_ms
    10-20 03:44PM 31.751 / 200 367ms 563cpu_ms
    10-20 03:45PM 09.913 / 200 407ms 563cpu_ms
    10-20 03:46PM 23.932 / 200 413ms 602cpu_ms
    10-20 03:47PM 19.530 / 200 416ms 583cpu_ms
    

    Served by hot instances result

    tipfy

    10-20 03:47PM 21.859 / 200 6ms 4cpu_ms
    10-20 03:47PM 23.003 / 200 8ms 5cpu_ms
    10-20 03:47PM 24.177 / 200 6ms 4cpu_ms
    10-20 03:47PM 25.166 / 200 6ms 4cpu_ms
    10-20 03:47PM 26.181 / 200 5ms 4cpu_ms
    

    Application

    tipfy

    urls.py:
    # -*- coding: utf-8 -*-
    """
        urls
        ~~~~
    
        URL definitions.
    
        :copyright: 2009 by tipfy.org.
        :license: BSD, see LICENSE.txt for more details.
    """
    from tipfy import Rule
    
    urls = [
        Rule('/', endpoint='home', handler='hello:HelloWorldHandler'),
    ]
    
    
    hello.py:
    from tipfy import RequestHandler
    from tipfy.ext.jinja2 import render_response
    
    class HelloWorldHandler(RequestHandler):
      def get(self, **kwargs):
        context = {'message': 'hello'}
        return render_response('index.html', **context)
    

    August 31, 2009

    Using pyjamas on Kay

    I use ${PYJAMAS_HOME} and ${PROJECT_DIR} variable for explanation here. ${PYJAMAS_HOME} is a directory in which you installed pyjamas. ${PROJECT_DIR} is your project directory.

    For opener, please begin with customizing ${PYJAMAS_HOME}/examples/jsonrpc. You need only JSONRPCExample.html in the `public` directory.


    $ tree kay-pyjamas-sample
    kay-pyjamas-sample
    |-- JSONRPCExample.py
    `-- public
    `-- JSONRPCExample.html

    1 directory, 2 files


    Edit your own JSONRPCExample.py as follows:

    import pyjd # dummy in pyjs

    from pyjamas.ui.RootPanel import RootPanel
    from pyjamas.ui.TextArea import TextArea
    from pyjamas.ui.Label import Label
    from pyjamas.ui.Button import Button
    from pyjamas.ui.HTML import HTML
    from pyjamas.ui.VerticalPanel import VerticalPanel
    from pyjamas.ui.HorizontalPanel import HorizontalPanel
    from pyjamas.ui.ListBox import ListBox
    from pyjamas.JSONService import JSONProxy

    class JSONRPCExample:
    def onModuleLoad(self):
    self.TEXT_WAITING = "Waiting for response..."
    self.TEXT_ERROR = "Server Error"
    self.METHOD_ECHO = "Echo"
    self.METHOD_REVERSE = "Reverse"
    self.METHOD_UPPERCASE = "UPPERCASE"
    self.METHOD_LOWERCASE = "lowercase"
    self.methods = [self.METHOD_ECHO, self.METHOD_REVERSE, self.METHOD_UPPERCASE, self.METHOD_LOWERCASE]

    self.remote_py = EchoServicePython()

    self.status=Label()
    self.text_area = TextArea()
    self.text_area.setText("""{'Test'} [\"String\"]
    \tTest Tab
    Test Newline\n
    after newline
    """ + r"""Literal String:
    {'Test'} [\"String\"]
    """)
    self.text_area.setCharacterWidth(80)
    self.text_area.setVisibleLines(8)

    self.method_list = ListBox()
    self.method_list.setName("hello")
    self.method_list.setVisibleItemCount(1)
    for method in self.methods:
    self.method_list.addItem(method)
    self.method_list.setSelectedIndex(0)

    method_panel = HorizontalPanel()
    method_panel.add(HTML("Remote string method to call: "))
    method_panel.add(self.method_list)
    method_panel.setSpacing(8)

    self.button_py = Button("Send to Python Service", self)

    buttons = HorizontalPanel()
    buttons.add(self.button_py)
    buttons.setSpacing(8)

    info = """

    JSON-RPC Example


    This example demonstrates the calling of server services with
    JSON-RPC.


    Enter some text below, and press a button to send the text
    to an Echo service on your server. An echo service simply sends the exact same text back that it receives.

    """

    panel = VerticalPanel()
    panel.add(HTML(info))
    panel.add(self.text_area)
    panel.add(method_panel)
    panel.add(buttons)
    panel.add(self.status)

    RootPanel().add(panel)

    def onClick(self, sender):
    self.status.setText(self.TEXT_WAITING)
    method = self.methods[self.method_list.getSelectedIndex()]
    text = self.text_area.getText()
    id = -1
    if method == self.METHOD_ECHO:
    id = self.remote_py.echo(text, self)
    elif method == self.METHOD_REVERSE:
    id = self.remote_py.reverse(text, self)
    elif method == self.METHOD_UPPERCASE:
    id = self.remote_py.uppercase(text, self)
    elif method == self.METHOD_LOWERCASE:
    id = self.remote_py.lowercase(text, self)
    if id<0:
    self.status.setText(self.TEXT_ERROR)

    def onRemoteResponse(self, response, request_info):
    self.status.setText(response)

    def onRemoteError(self, code, message, request_info):
    self.status.setText("Server Error or Invalid Response: ERROR %d - %s" %
    (code, message))


    class EchoServicePython(JSONProxy):
    def __init__(self):
    JSONProxy.__init__(self, "/json", ["echo", "reverse", "uppercase", "lowercase"])

    if __name__ == '__main__':
    # for pyjd, set up a web server and load the HTML from there:
    # this convinces the browser engine that the AJAX will be loaded
    # from the same URI base as the URL, it's all a bit messy...
    pyjd.setup("http://127.0.0.1/examples/jsonrpc/public/JSONRPCExample.html")
    app = JSONRPCExample()
    app.onModuleLoad()
    pyjd.run()


    Then, cd into this directory and compile it. This time, I use ${PROJECT_DIR}/media for a target directory.


    $ cd kay-pyjamas-sample
    $ ${PYJAMAS_HOME}/bin/pyjsbuild -o ${PROJECT_DIR}/media JSONRPCExample.py


    If succeed, you'll get ${PROJECT_DIR}/media/JSONRPCExample.html. Please access http://localhost:8080/media/JSONRPCExample.html and, you'll get forms for testing jsonrpc.

    Let's write server side code. First, you need to edit urls.py in your application.

    ${PROJECT_DIR}/myapp/urls.py

    # -*- coding: utf-8 -*-
    # myapp.urls


    from werkzeug.routing import (
    Map, Rule, Submount,
    EndpointPrefix, RuleTemplate,
    )
    import myapp.views

    def make_rules():
    return [
    EndpointPrefix('myapp/', [
    Rule('/', endpoint='index'),
    Rule('/json', endpoint='json_rpc'),
    ]),
    ]

    all_views = {
    'myapp/index': myapp.views.index,
    'myapp/json_rpc': myapp.views.json_rpc,
    }


    You also need to edit views.py.

    ${PROJECT_DIR}/myapp/views.py

    # -*- coding: utf-8 -*-
    # myapp.views
    # ... (snip)

    import simplejson

    # ... (snip)

    def json_uppercase(args):
    return [args[0].upper()]

    def json_echo(args):
    return [args[0]]

    def json_reverse(args):
    return [args[0][::-1]]

    def json_lowercase(args):
    return [args[0].lower()]

    def json_rpc(request):
    if request.method:
    args = simplejson.loads(request.data)
    method_name = 'json_%s' % args[u"method"]
    json_func = globals().get(method_name)
    json_params = args[u"params"]
    json_method_id = args[u"id"]
    result = json_func(json_params)
    args.pop(u"method")
    args["result"] = result[0]
    args["error"] = None
    return Response(simplejson.dumps(args), content_type="application/json")
    else:
    return Response('Error')


    That's all. Please enjoy :-)

    Kay で pyjamas を使う

    日本語の情報もできたのでちょっと変わり種をやります。

    Python 版 GWT である pyjamas を Kay と組み合わせてみました.. と言っても jsonrpc の簡単なサンプルを動かしただけですが。

    Pyjamas をインストールした場所を ${PYJAMAS_HOME} と、プロジェクトのディレクトリを ${PROJECT_DIR} として進めましょう。

    ${PYJAMAS_HOME}/examples/jsonrpc をいじって使います。public 以下は JSONRPCExample.html だけ必要みたい。


    $ tree kay-pyjamas-sample
    kay-pyjamas-sample
    |-- JSONRPCExample.py
    `-- public
    `-- JSONRPCExample.html

    1 directory, 2 files


    JSONRPCExample.py を下記のように少しいじります。

    import pyjd # dummy in pyjs

    from pyjamas.ui.RootPanel import RootPanel
    from pyjamas.ui.TextArea import TextArea
    from pyjamas.ui.Label import Label
    from pyjamas.ui.Button import Button
    from pyjamas.ui.HTML import HTML
    from pyjamas.ui.VerticalPanel import VerticalPanel
    from pyjamas.ui.HorizontalPanel import HorizontalPanel
    from pyjamas.ui.ListBox import ListBox
    from pyjamas.JSONService import JSONProxy

    class JSONRPCExample:
    def onModuleLoad(self):
    self.TEXT_WAITING = "Waiting for response..."
    self.TEXT_ERROR = "Server Error"
    self.METHOD_ECHO = "Echo"
    self.METHOD_REVERSE = "Reverse"
    self.METHOD_UPPERCASE = "UPPERCASE"
    self.METHOD_LOWERCASE = "lowercase"
    self.methods = [self.METHOD_ECHO, self.METHOD_REVERSE, self.METHOD_UPPERCASE, self.METHOD_LOWERCASE]

    self.remote_py = EchoServicePython()

    self.status=Label()
    self.text_area = TextArea()
    self.text_area.setText("""{'Test'} [\"String\"]
    \tTest Tab
    Test Newline\n
    after newline
    """ + r"""Literal String:
    {'Test'} [\"String\"]
    """)
    self.text_area.setCharacterWidth(80)
    self.text_area.setVisibleLines(8)

    self.method_list = ListBox()
    self.method_list.setName("hello")
    self.method_list.setVisibleItemCount(1)
    for method in self.methods:
    self.method_list.addItem(method)
    self.method_list.setSelectedIndex(0)

    method_panel = HorizontalPanel()
    method_panel.add(HTML("Remote string method to call: "))
    method_panel.add(self.method_list)
    method_panel.setSpacing(8)

    self.button_py = Button("Send to Python Service", self)

    buttons = HorizontalPanel()
    buttons.add(self.button_py)
    buttons.setSpacing(8)

    info = """

    JSON-RPC Example


    This example demonstrates the calling of server services with
    JSON-RPC.


    Enter some text below, and press a button to send the text
    to an Echo service on your server. An echo service simply sends the exact same text back that it receives.

    """

    panel = VerticalPanel()
    panel.add(HTML(info))
    panel.add(self.text_area)
    panel.add(method_panel)
    panel.add(buttons)
    panel.add(self.status)

    RootPanel().add(panel)

    def onClick(self, sender):
    self.status.setText(self.TEXT_WAITING)
    method = self.methods[self.method_list.getSelectedIndex()]
    text = self.text_area.getText()
    id = -1
    if method == self.METHOD_ECHO:
    id = self.remote_py.echo(text, self)
    elif method == self.METHOD_REVERSE:
    id = self.remote_py.reverse(text, self)
    elif method == self.METHOD_UPPERCASE:
    id = self.remote_py.uppercase(text, self)
    elif method == self.METHOD_LOWERCASE:
    id = self.remote_py.lowercase(text, self)
    if id<0:
    self.status.setText(self.TEXT_ERROR)

    def onRemoteResponse(self, response, request_info):
    self.status.setText(response)

    def onRemoteError(self, code, message, request_info):
    self.status.setText("Server Error or Invalid Response: ERROR %d - %s" %
    (code, message))


    class EchoServicePython(JSONProxy):
    def __init__(self):
    JSONProxy.__init__(self, "/json", ["echo", "reverse", "uppercase", "lowercase"])

    if __name__ == '__main__':
    # for pyjd, set up a web server and load the HTML from there:
    # this convinces the browser engine that the AJAX will be loaded
    # from the same URI base as the URL, it's all a bit messy...
    pyjd.setup("http://127.0.0.1/examples/jsonrpc/public/JSONRPCExample.html")
    app = JSONRPCExample()
    app.onModuleLoad()
    pyjd.run()


    そしたらそのディレクトリに入ってコンパイルします。今回はターゲットを直
    接 ${PROJECT_DIR}/media にしてしまいます。


    $ cd kay-pyjamas-sample
    $ ${PYJAMAS_HOME}/bin/pyjsbuild -o ${PROJECT_DIR}/media JSONRPCExample.py


    成功すると ${PROJECT_DIR}/media/JSONRPCExample.html が出来ます。
    http://localhost:8080/media/JSONRPCExample.html で画面が出ていればまあ成功です。

    サーバーサイドは下記の通りにします。myapp はアプリケーション名に読み換
    えてくださいね。

    ${PROJECT_DIR}/myapp/urls.py

    # -*- coding: utf-8 -*-
    # myapp.urls


    from werkzeug.routing import (
    Map, Rule, Submount,
    EndpointPrefix, RuleTemplate,
    )
    import myapp.views

    def make_rules():
    return [
    EndpointPrefix('myapp/', [
    Rule('/', endpoint='index'),
    Rule('/json', endpoint='json_rpc'),
    ]),
    ]

    all_views = {
    'myapp/index': myapp.views.index,
    'myapp/json_rpc': myapp.views.json_rpc,
    }


    最後に view です。

    ${PROJECT_DIR}/myapp/views.py

    # -*- coding: utf-8 -*-
    # myapp.views
    # ... 省略

    import simplejson

    # ... 省略

    def json_uppercase(args):
    return [args[0].upper()]

    def json_echo(args):
    return [args[0]]

    def json_reverse(args):
    return [args[0][::-1]]

    def json_lowercase(args):
    return [args[0].lower()]

    def json_rpc(request):
    if request.method:
    args = simplejson.loads(request.data)
    method_name = 'json_%s' % args[u"method"]
    json_func = globals().get(method_name)
    json_params = args[u"params"]
    json_method_id = args[u"id"]
    result = json_func(json_params)
    args.pop(u"method")
    args["result"] = result[0]
    args["error"] = None
    return Response(simplejson.dumps(args), content_type="application/json")
    else:
    return Response('Error')


    適当な作りですが、まあこれで動きます。興味があれば色々工夫してみてくだ
    さい。

    今日はここでおしまいです。

    August 4, 2009

    Kay framework を使ってみる

    Kay framework を 7/7 にリリースしたわけですが、日本語での情報が無いので少しずつ書いていくことにしようと思います。

    始め方


    必要なものは下記の通りです。

    • Python-2.5
    • App Engine SDK Python
    • Kay framework


    macports を使って python25 を入れた場合は、他に下記もインストールしましょう。

    • py25-hashlib
    • py25-socket-ssl
    • py25-pil
    • py25-ipython


    Kay のリリース版を使う場合は、下記のダウンロードページから tar ball を落として使います。リポジトリを追いかける場合は、mercurial で clone してください。

    ダウンロードページ: http://code.google.com/p/kay-framework/downloads/list

    clone するには:

    $ hg clone https://kay-framework.googlecode.com/hg/ kay


    プロジェクトを始める


    kay の manage.py スクリプトでプロジェクトディレクトリを作る事ができます。

    $ python kay/manage.py startproject myproject
    $ tree myproject
    myproject
    |-- app.yaml
    |-- kay -> /Users/tmatsuo/work/tmp/kay/kay
    |-- manage.py -> /Users/tmatsuo/work/tmp/kay/manage.py
    |-- settings.py
    `-- urls.py

    1 directory, 4 files


    シンボリックリンクをサポートしているプラットフォームでは kay ディレクトリと manage.py へのシンボリックリンクが作成されます。後で kay の場所を動かすときっと動かなくなるのですが、そんな時はリンクを張り直してください。

    アプリケーションを作る


    出来たばかりの myproject ディレクトリに cd して、早速アプリケーションを作りましょう。

    $ cd myproject
    $ python manage.py startapp myapp
    $ tree myapp
    myapp
    |-- __init__.py
    |-- models.py
    |-- templates
    | `-- index.html
    |-- urls.py
    `-- views.py

    1 directory, 5 files


    こうして作成した myapp を動作させるにはもうひと手間必要です。settings.py の INSTALLED_APPS に登録します。必要なら APP_MOUNT_POINTS も登録します。下記の例では、アプリケーションをルート URL にマウントする例です。APP_MOUNT_POINTS を設定しない場合は、/myapp というようにアプリケーション名 URL にマウントされます。

    settings.py

    #$/usr/bin/python
    #..
    #..

    INSTALLED_APPS = (
    'kay.sessions',
    'myapp',
    )

    APP_MOUNT_POINTS = {
    'myapp': '/',
    }


    見れば分かると思いますが、INSTALLED_APPS はタプルで、APP_MOUNT_POINTS は dict になっています。

    アプリケーションを動かす


    作ったアプリケーションを動かしてみましょう。下記のコマンドで開発サーバが起動する筈です。

    $ python manage.py runserver
    INFO 2009-08-04 05:48:21,339 appengine_rpc.py:157] Server: appengine.google.com
    ...
    ...
    INFO 2009-08-04 05:48:21,448 dev_appserver_main.py:465] Running application myproject on port 8080: http://localhost:8080

    この状態で http://localhost:8080/ にアクセスすると、「Hello」又は「こんにちは」と表示される筈です。

    GAE にアップロードする


    GAE にアップロードするには、対象の appid を app.yaml の application に設定してから、下記のコマンドを使用します。

    $ python manage.py appcfg update


    成功すると、http://your-appid.appspot.com/ でアクセスできるようになります。

    今日はここまでにしますね。けっこう簡単に始められる事がお分かりいただけたでしょうか。次回はモデル定義とか、フォームの自動生成などについてお話しする予定です。

    当分このシリーズを続けるつもりなので、取り上げて欲しいトピックなどがあればコメントください。

    May 15, 2009

    A patch for Werkzeug debugger on GAE

    I wrote about using werkzeug on gae, but actually there are still several problems in debug console. So I wrote a patch for it.


    diff -r 8ffe4e637e17 werkzeug/debug/console.py
    --- a/werkzeug/debug/console.py Sat Apr 25 17:06:40 2009 +0000
    +++ b/werkzeug/debug/console.py Fri May 15 00:40:32 2009 +0900
    @@ -32,6 +32,12 @@
    def close(self):
    pass

    + def flush(self):
    + pass
    +
    + def seek(self, n, mode=0):
    + pass
    +
    def reset(self):
    val = ''.join(self._buffer)
    del self._buffer[:]
    @@ -48,12 +54,18 @@
    def writelines(self, x):
    self._write(escape(''.join(x)))

    + def readline(self):
    + if len(self._buffer) == 0:
    + return ''
    + ret = self._buffer[0]
    + del self._buffer[0]
    + return ret

    class ThreadedStream(object):
    """Thread-local wrapper for sys.stdout for the interactive console."""

    def push():
    - if sys.stdout is sys.__stdout__:
    + if not isinstance(sys.stdout, ThreadedStream):
    sys.stdout = ThreadedStream()
    _local.stream = HTMLStringO()
    push = staticmethod(push)

    May 14, 2009

    Using Werkzeug's debugger on GAE dev server

    There is a very good web framework called Werkzeug. The debugger of Werkzeug is pretty nice and we can use inline console on our web browser with it.

    The author of Werkzeug wrote an article of how to use this debugger with GAE dev server. However according this article, the inline console is not usable.

    After a little struggling, finally I can use the debugger on GAE dev server. GAE dev server creates an instance of DebuggedApplication on every request. I think its the reason why. So, it seems that specifying the instance as the module global singleton made it work.


    _debugged_app = None
    app = ... build your wsgi app ...

    def main():
    # Only run the debugger in development.
    import os, sys
    if 'SERVER_SOFTWARE' in os.environ and os.environ['SERVER_SOFTWARE'].startswith('Dev'):
    # use our debug.utils with Jinja2 templates
    import debug.utils
    sys.modules['werkzeug.debug.utils'] = debug.utils

    # don't use inspect.getsourcefile because the imp module is empty
    import inspect
    inspect.getsourcefile = inspect.getfile

    # wrap the application
    from werkzeug import DebuggedApplication
    global _debugged_app
    if _debugged_app is None:
    _debugged_app = app = DebuggedApplication(app, evalex=True)
    else:
    app = _debugged_app

    Google App Engine で Werkzeug のデバッガを使う

    Werkzeug という Python Web Framework があります。Werkzeug のデバッガはなかなかすぐれもので Web アプリでエラーが出るとインライン console が使えたりします。

    このデバッガを GAE の dev server で使う方法を作者の方が書いているのですが、この通りやるとインライン console が使えなかったりします。

    ちょっと調べてみたら意外と簡単に使えました。GAE の dev server だとリクエスト毎に DebuggedApplication のインスタンスが作り直されてしまうので、これを module global のシングルトンにしてやればオッケイでした。


    _debugged_app = None
    app = ... build your wsgi app ...

    def main():
    # Only run the debugger in development.
    import os, sys
    if 'SERVER_SOFTWARE' in os.environ and os.environ['SERVER_SOFTWARE'].startswith('Dev'):
    # use our debug.utils with Jinja2 templates
    import debug.utils
    sys.modules['werkzeug.debug.utils'] = debug.utils

    # don't use inspect.getsourcefile because the imp module is empty
    import inspect
    inspect.getsourcefile = inspect.getfile

    # wrap the application
    from werkzeug import DebuggedApplication
    global _debugged_app
    if _debugged_app is None:
    _debugged_app = app = DebuggedApplication(app, evalex=True)
    else:
    app = _debugged_app

    March 20, 2009

    Android hack-a-thon

    3/20に Android hack-a-thon に参加してきました。

    みなさん一日で色々作っています。すごいな〜

    私の方は、全くの初心者なので午前中は HelloWorld をやってみました。午後からは gdata のライブラリを使って Google Apps のグループアドレスを作成できるようなアプリケーションにトライ。

    gdata の jar をプロジェクトに取り込み、必要な画面を作るところまではうまくいったけど、 GroupService の認証をするところでうまくいかず、当日はここで断念。原因はSSL証明書の検証が失敗している事まではつきとめたんですけど...

    せっかくなので今日がんばって動かす事ができたので書きます。

    まず gdata の Java クライアントのソースを落としてきて、下記のパッチを当てます。内容はSSL証明書の検証が必ず成功するようにしているだけです。


    diff -uNr gdata/java/src/com/google/gdata/client/GoogleAuthTokenFactory.java gdata.mine/java/src/com/google/gdata/client/GoogleAuthTokenFactory.java
    --- gdata/java/src/com/google/gdata/client/GoogleAuthTokenFactory.java 2009-02-12 05:09:34.000000000 +0900
    +++ gdata.mine/java/src/com/google/gdata/client/GoogleAuthTokenFactory.java 2009-03-22 13:49:42.000000000 +0900
    @@ -16,6 +16,13 @@

    package com.google.gdata.client;

    +import org.apache.http.conn.ssl.X509HostnameVerifier;
    +import javax.security.cert.X509Certificate;
    +import javax.net.ssl.HttpsURLConnection;
    +import javax.net.ssl.SSLSession;
    +import javax.net.ssl.SSLSocket;
    +import javax.net.ssl.SSLException;
    +
    import com.google.gdata.util.common.base.CharEscapers;
    import com.google.gdata.util.common.base.StringUtil;
    import com.google.gdata.client.GoogleService.AccountDeletedException;
    @@ -450,7 +457,27 @@

    // Open connection
    HttpURLConnection urlConnection = (HttpURLConnection) url.openConnection();
    -
    + if ( urlConnection instanceof HttpsURLConnection ) {
    + HttpsURLConnection ucs = (HttpsURLConnection) urlConnection;
    + ucs.setHostnameVerifier( new X509HostnameVerifier(){
    + @Override
    + public boolean verify(String arg0, SSLSession arg1) {
    + return true;
    + }
    + @Override
    + public void verify(String arg0, SSLSocket arg1) throws IOException {
    + }
    + @Override
    + public void verify(String arg0,
    + java.security.cert.X509Certificate arg1)
    + throws SSLException {
    + }
    + @Override
    + public void verify(String arg0, String[] arg1, String[]
    + arg2) throws SSLException {
    + }
    + });
    + }
    // Set properties of the connection
    urlConnection.setDoInput(true);
    urlConnection.setDoOutput(true);
    diff -uNr gdata/java/src/com/google/gdata/client/appsforyourdomain/AppsGroupsService.java gdata.mine/java/src/com/google/gdata/client/appsforyourdomain/AppsGroupsService.java
    --- gdata/java/src/com/google/gdata/client/appsforyourdomain/AppsGroupsService.java 2009-02-12 05:09:34.000000000 +0900
    +++ gdata.mine/java/src/com/google/gdata/client/appsforyourdomain/AppsGroupsService.java 2009-03-22 14:10:47.000000000 +0900
    @@ -37,7 +37,7 @@
    public class AppsGroupsService extends AppsPropertyService {

    public static final String BASE_URL =
    - "http://apps-apis.google.com/a/feeds/group/2.0/";
    + "https://apps-apis.google.com/a/feeds/group/2.0/";
    public final String baseDomainUrl;

    public static final String APPS_PROP_GROUP_ID = "groupId";
    diff -uNr gdata/java/src/com/google/gdata/client/http/HttpGDataRequest.java gdata.mine/java/src/com/google/gdata/client/http/HttpGDataRequest.java
    --- gdata/java/src/com/google/gdata/client/http/HttpGDataRequest.java 2009-02-12 05:09:35.000000000 +0900
    +++ gdata.mine/java/src/com/google/gdata/client/http/HttpGDataRequest.java 2009-03-22 13:49:39.000000000 +0900
    @@ -16,6 +16,13 @@

    package com.google.gdata.client.http;

    +import org.apache.http.conn.ssl.X509HostnameVerifier;
    +import javax.security.cert.X509Certificate;
    +import javax.net.ssl.HttpsURLConnection;
    +import javax.net.ssl.SSLSession;
    +import javax.net.ssl.SSLSocket;
    +import javax.net.ssl.SSLException;
    +
    import com.google.gdata.util.common.xml.XmlWriter;
    import com.google.gdata.client.AuthTokenFactory;
    import com.google.gdata.client.GDataProtocol;
    @@ -312,6 +319,29 @@
    }
    HttpURLConnection uc = (HttpURLConnection) requestUrl.openConnection();

    + // Open connection
    + if ( uc instanceof HttpsURLConnection ) {
    + HttpsURLConnection ucs = (HttpsURLConnection) uc;
    + ucs.setHostnameVerifier( new X509HostnameVerifier(){
    + @Override
    + public boolean verify(String arg0, SSLSession arg1) {
    + return true;
    + }
    + @Override
    + public void verify(String arg0, SSLSocket arg1) throws IOException {
    + }
    + @Override
    + public void verify(String arg0,
    + java.security.cert.X509Certificate arg1)
    + throws SSLException {
    + }
    + @Override
    + public void verify(String arg0, String[] arg1, String[]
    + arg2) throws SSLException {
    + }
    + });
    + }
    +
    // Should never cache GData requests/responses
    uc.setUseCaches(false);


    あと gdata/java/build-src/core.xml のコンパイル箇所で android.jar に classpath を通せばコンパイルが通ります。(メッセージに従って mail.jar と activation.jar を用意する必要もあるけど)

    でき上がった gdata-appsforyourdomain-1.0.jar と gdata-core-1.0.jar を使うときちんと動かすことができました。手軽に Google Apps の Group を追加できるだけのしょーもないアプリですが...


    これを進化させて Google Apps の管理コンソールが作れそう。でも需要は無さそうだなorz

    March 5, 2009

    Werkzeug の easteregg


    僕も最近話題の Werkzeug を使ってみようと思いました。しかしまだ使うまでにいたらず、とりあえず easteregg を発見して喜んでいる状態です。

    February 23, 2009

    Gaebarを使ってみた


    先日 App Gallery という GAE 上のサービスを始めてみました。サービスをやるからにはデータをバックアップしたいと思い、Gaebar を試してみたのでご紹介します。

    なんと Gaebar の画面は django pony です!

    Gaebar は Google App Engine Backup And Restore の略で、文字通り Google App Engine 用のバックアップ・リストアツールです。ゲイバーと読むそうです。この名前が良いですねw

    Gaebar は Django のアプリケーションで簡単に使えます。GAE上で動く既存の Django アプリケーションにプラグインする事で、バックアップ・リストア機能を追加する事ができます。

    残念ながら今は Django で動いているアプリケーションでしか使えませんが、少し頑張れば同じ事は別のフレームワークでも可能だと思います。

    準備する

    まずは Gaebar をダウンロードします。
    Gaebar github から Download 機能を使ってアーカイブをダウンロードするか、下記のように git で clone しても良いです。

    $ git clone git://github.com/aral/gaebar.git

    またはあなたのプロジェクトが git を使っているなら下記のコマンドが良いかもしれません。

    $ git submodule add git://github.com/aral/gaebar.git


    方法はともあれ、プロジェクト直下に gaebar というディレクトリができていれば大丈夫です。

    次に GAE の SDK にパッチを当てます。これは Gaebar がデータを python のファイルとしてダウンロードしてきてローカルのファイルシステムに保存するために必要なのです。方法が AralのBlog Entry に乗っていますが、この情報は少し古いので、SDK-1.1.9では下記のパッチを使ってください。

    --- ../google_appengine/google/appengine/tools/dev_appserver.py.org 2009-02-26 11:33:33.000000000 +0900
    +++ ../google_appengine/google/appengine/tools/dev_appserver.py 2009-02-20 17:04:46.000000000 +0900
    @@ -1274,6 +1274,7 @@
    allowed_symbols = self._WHITE_LIST_PARTIAL_MODULES[module.__name__]
    for symbol in set(module.__dict__) - set(allowed_symbols):
    if not (symbol.startswith('__') and symbol.endswith('__')):
    + module.__dict__['old_'+symbol] = module.__dict__[symbol]
    del module.__dict__[symbol]

    if module.__name__ in self._MODULE_OVERRIDES:


    注意) app-engine-patch を使う場合は、settings.py で DJANGO_STYLE_MODEL_KIND = False にしないと動きませんでした。(少なくとも私は動かせませんでした。)動かせた方がいたら教えてください :-)

    1. settings.py は下記のようにします。

    INSTALLED_APPS = (
    # Other apps...
    'gaebar',
    )


    2. urls.py は下記のとおりです

    urlpatterns = patterns('',

    # ...other URLs

    url(r'^gaebar/', include('gaebar.urls')),
    )


    3. app.yaml に static folder を追加します。

    # Static: Gaebar
    - url: /gaebar/static
    static_dir: gaebar/static


    4. index.yaml にインデックスを追加します。一回 dev server で Gaebar を動かせば自動で追加されます。

    - kind: GaebarCodeShard
    properties:
    - name: backup
    - name: created_at


    5. Gaebar の設定を settings.py に追加します。

    GAEBAR_LOCAL_URL: ローカル開発サーバの絶対 URL を書きます。
    GAEBAR_SECRET_KEY: 秘密の文字列を記入します。誰にも秘密にしてください。
    GAEBAR_SERVERS: dict でサーバーを列挙します。
    GAEBAR_MODELS: tuple でバックアップするモデルを列挙します。

    App Gallery で使用している設定のサンプルを下記に掲載します。

    GAEBAR_LOCAL_URL = 'http://localhost:8000'
    GAEBAR_SECRET_KEY = 'replace_with_your_secret_key'

    GAEBAR_SERVERS = {
    u'Deployment': u'http://app-gallery.appspot.com',
    u'Staging': u'http://app-gallery-staging.appspot.com',
    u'Local Test': u'http://localhost:8080',
    }

    GAEBAR_MODELS = (
    (
    'appgallery.models',
    (u'Application', u'ThumbnailImage'),
    ),
    (
    'tags.models',
    (u'Tag', u'TagApplication')
    ),
    (
    'favorites.models',
    (u'Favorite',)
    ),
    (
    'ragendja.auth.custom_models',
    (u'User',),
    ),
    )


    あと注意点がもう一つ。ローカル開発サーバーで django.contrib.csrf.middleware.CsrfMiddleware を使っているとバックアップがうまく行きませんでした。なので私はローカル開発サーバーでだけ CsrfMiddleware をオフにしています。

    やった!これで Gaebar が使用できます。使う前に、Gaebar がどんな風に動くか説明しておきますね。

    Gaebar は datastore のデータを Python code としてバックアップします。その Python code を実行する事でリストアします。バックアップは長くかかりますが、GAE はそれを許さないので、Gaebar は バックアップとリストアのプロセスを細切れにして ajax を使って繰り返し呼び出します。

    デフォルトでは Gaebar は 5 つの Entity をバックアップし Python code に変換し、1MB の制限を回避するために 300KB くらいのコード断片として datastore に保存します。バックアップの過程では、このすぐ後に、コード断片をローカルサーバー側にダウンロードして保存する事になります。

    もしあなたがもっと高い Quota を持っているなら、views.py をいじる事でこれらのデフォルト値を変えられます。

    Gaebar を使う時は、十分にテストしてから使ってくださいね。万が一データが消失しても、私や Aral は責任を持てませんので。

    使い方

    A. リモートバックアップを取るには

    1. Gaebar をあなたのアプリケーションと一緒に GAE にデプロイします

    注意: デプロイする時に、gaebar/backups フォルダ内のバックアップデータも一緒にアップロードされる事を頭にいれておいてください。不必要ならバックアップデータは別の場所に移動した状態でデプロイすると良いでしょう。

    2. 本番サーバで Gaebar にアクセスします。(例: http://myapp.appspot.com/gaebar/ )

    3. Create New Backup ボタンをクリックします。

    * バックアップをする時に、ローカル開発サーバーが動作している必要があります。

    注意: reference error が発生した場合(存在しない Entity への ReferenceProperty)は、バックアップ時には無視されます。リストアすれば reference error は消滅します。

    注意: 今までバックアップした一番大きなデータストアは 18995 行で 223 code 断片、35MB ありました。ローカル開発サーバーへのリストアは一晩中かかりました(ローカル開発サーバーの datastore は激遅なので)。もし記録を破ったら aral@aralbalkan.com に教えてあげてください :-)

    注意2: バックアップ中の例外を詳しく見たい場合は、本番サーバーの settings.py で DEBUG_PROPAGATE_EXCEPTIONS = True と設定してください。


    B. ローカルでリストアする

    開発中に、リアル世界のデータを使ってテストするために、ローカルの開発サーバーにデータをリストアできます。

    1. ローカル開発サーバの Gaebar ページに行きます。(例: http://localhost:8000/gaebar/ )
    2. リストからリストアしたいバックアップデータを選びます。
    3. 終わるまで待ちます。

    tips: あらかじめ /var/tmp/ にある datastore の history ファイルのバックアップを取った方が良いです。

    ローカルのデータストアは非常に遅いので、覚悟してください。

    C. ステージング環境にリストアする

    GAE にはバージョニング機能がありますが、datastore は別バージョン間でも共通です。ですからステージング用の別アプリを使用するのは良い考えでしょう。

    本番とは別のアプリケーションスロットを用意して、そこにリストアしたいバックアップデータと一緒に Gaebar をデプロイします。後はローカル開発サーバーでのリストアと同じです。

    D. 本番環境にリストアする

    本番環境でトラブルがあった場合などは、バックアップからリストアできます。データストアのデータは上書きされるので注意してください。


    実際に App Gallery でもバックアップ・リストアしてみましたが、完璧に動いています。Gaebar はかなり便利なのでみなさんも使ってみてはいかがでしょうか。

    February 11, 2009

    Mercurial deps extension

    Mercurial で svn:externals みたいな事できないのか #mercurial irc で聞いてみたところ、deps extensionを使うと良いらしい。

    Mercurial に同梱されてないので別途このへんから落として来て使う。

    設定


    deps.py を適当なところに置いて、hgrc に下記のように設定する。
    [extensions]
    hgext.deps =
    # 又は deps.py を hgext dir 以外に置いたなら下記のようにする
    # deps = /path/to/deps.py


    ロケーション設定


    依存関係のロケーションを設定する。これも hgrc に書く。ここで紹介する例は libfoo が外部 Mercurial リポジトリにあって、libbar は外部の CVS で管理されている場合。

    [deps]
    aliases = libfoo, libbar
    alias.libfoo = /path/to/libfoo
    alias.libbar = :pserver:anonymous@cvs.server.org:/sources/bar
    alias.libbar.command = cvs -z3 -d$source co -r $rev -d $dest bar


    実際の依存関係を設定


    これはコマンドで行う。
    $ hg deps -a libfoo -r 3a9b061bada1 -d lib/foo 0.9.1
    $ hg deps -a libbar -r v0r7_8 -d lib/bar 0.9.1

    $ hg deps -a libfoo -r f24139319bdb -d lib/foo 1.0
    $ hg deps -a libbar -r v0r8_0 -d lib/bar 1.0


    書式はこう

    hg deps -a <ロケーション設定のalias名> -r <外部のリビジョン> -d  <本体のバージョン>


    本体のバージョンに応じて外部リポジトリのリビジョンを変えたりできるわけか。

    で、これをすると下記のような .hgdeps というファイルが出来る。これも hg add するのが良いみたい。
    [1.0]
    f24139319bdb libfoo lib/foo
    v0r8_0 libbar lib/bar

    [0.9.1]
    3a9b061bada1 libfoo lib/foo
    v0r7_8 libbar lib/bar


    依存関係を持ってくる


    下記のようにして clone するくらいしか機能は無いみたい。
    $ hg depsclone 1.0


    この例では、バージョン 1.0 用の外部依存関係を取ってくる事ができる。

    まあすごく便利っていうわけでも無いし、使いたい人も限られてるだろうけど、Mercurial で svn:externals みたいな事がしたい人は試してみてください。

    January 31, 2009

    Google Apps に Group 機能が来ました

    いつの間にか Google Apps の有料版にグループ機能が来ました。もしかするとコントロールパネルを拡張版にしないと出てこないかもしれません。おそらく今までの maillist 機能を拡張した機能で、ざっと触ってみたところ


    1. いくらでも入れ子に出来る

    2. メンバーのロールが Owner と Member の二種類ある

    3. ドメイン外のユーザを Owner としても Member としても追加できる

    4. このグループへの送信者を下記のグループ単位で制限できる


      • Owners
      • Members
      • ドメイン内のユーザ
      • Any mail address

    5. どうやら Google Document や Google Sites の invite の時に使えそう


    今までは Google Apps を導入するお客さんには別立てでメーリングリストのサーバ(mailmanとか)を勧める事が多かったけど、これからはあまり必要なくなるかもしれませんね。